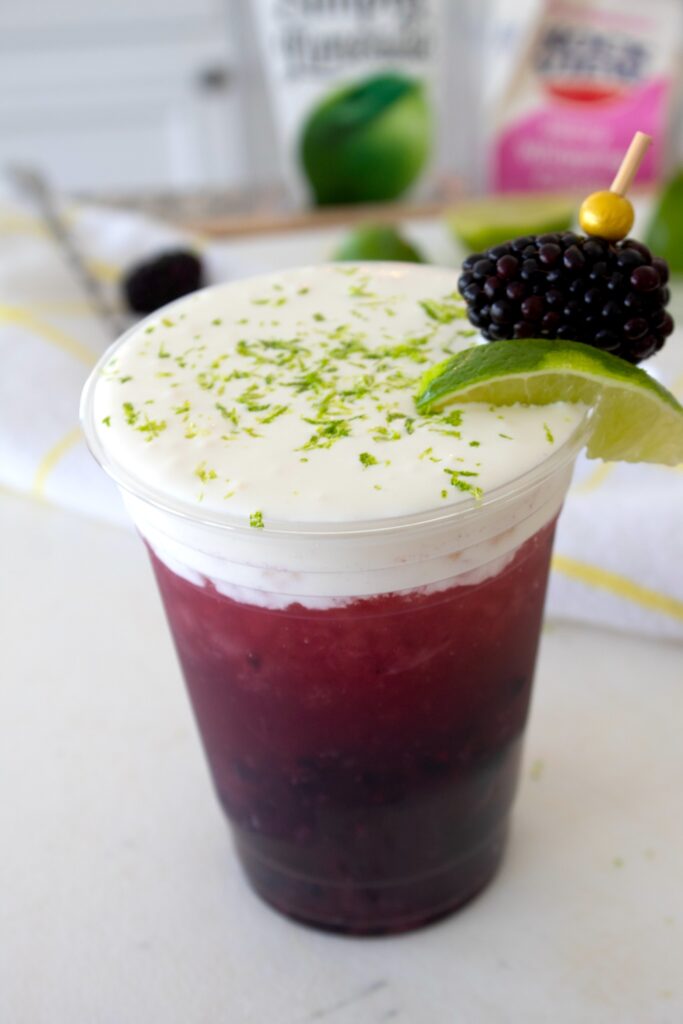
Blackberry Limeade Mocktail (with cloud topping)
I have really been into making fun beverages lately. I made these blackberry limeades the other week and I’ve had one a day ever since! I use fresh blackberries, muddled with limeade, and a creamy delicious cloud topping to give it a cafe quality aesthetic. The end result is a delicious mocktail you’ll enjoy both sipping, and looking at!
Blackberry Mocktail Recipe
The trick to this recipe is using fresh blackberries. Summer is the perfect time to pick some! You can usually find them in the grocery store between the May to September months.
Blackberries make for the perfect mocktail because they are not overly sweet. They have a rich, dark hue which not only is beautiful, but adds a little bit of texture to the mocktail itself!

Muddling Blackberries for a Blackberry Mocktail
For each beverage add about 5-6 blackberries in an 16 ounce glass or cup. I used a larger cup because I like to account for ice, which results in a beverage that is roughly about 8 ounces total.
Use a muddler to muddle the blackberries. If you don’t have a muddler, you can buy one on Amazon here for less than $7 (and it comes with a long spoon which is perfect for stirring beverages and coffee!). Press down on the berries and squish them as you muddle them to create a puree.

Layering Blackberry Limeade
After muddling the blackberries, add ice, and then limeade. You can choose to make your own limeade or buy store bought. My favorite brand of limeade is Simply.
The key to layering beverages is to layer them according to density so they stay separated until mixed. For this recipe, the blackberry puree is the most dense, so it stays on the bottom. I recommend adding ice after the blackberry mixture, and then adding in the limeade, very slowly. This will ensure the blackberry puree stays on the bottom of the cup, creating an ombre effect!
Cloud Topping (Optional, but delicious!)
Cloud toppings on mocktails really elevate them to the next level! I love the visual, and textural appeal of them. For this recipe, the cloud toping has some lime juice and zest in it to add to the flavor. It’s super refreshing! I use a handheld coffee frother to mix the cloud topping. It can take an extra minute or two, but it’s worth it to me to not have to clean a blender!

Gently pour the whipped topping over the iced blackberry limeade, and that’s it! You just made the freshest, most delicious blackberry mocktail. I like to add some lime zest, and a couple garnishes to make it really festive!

I really enjoyed drinking this by the pool! It was so refreshing.
A few tips:
- If you want a less sweet drink, use about half the limeade, and half plain seltzer.
- For even more flavor, add in a few pieces of fresh chopped basil when you’re muddling the blackberries. You can also use mint for a mojito-esque flavor.
- If you want the cups I used you can get them here on Amazon. I love having these for fun beverages on the go.
- One of my besties and I drank these at our kids’ gymnastics class and we had 3 other parent ask us where we got them from!
- You can make a big batch of these to serve a crowd! If you’re making a large batch, serve the whipped topping on the side and let your guests serve themselves.

More Beverage Recipes
If you made this recipe, rate it below, and don’t forget to share it social media!
Tag us @GigglingFork on Instagram or use #GigglingFork. We love to see your recipes!
Enjoy! – Kathi and Rachel

Blackberry Limeade (with cloud topping)
Ingredients
- 6 blackberries
- 3/4 cup limeade
- 1 cup nugget ice
Cloud Topping
- 3 tbsp heavy whipping cream
- 1 tsp lime juice
- lime zest
- pinch salt
- pinch sugar
Instructions
- To make cloud topping, combine lime juice, salt, and sugar with heavy whipping cream. Using a coffee frother, mix until fluffy (do not overtax or it will turn into whipping cream). Set aside.
- In a 16 ounce glass, muddle blackberries.
- Add ice. Slowly pour limeade to layer beverage.
- Gently pour cloud topping over blackberry limeade.
- Garnish with lime zest if desired. Serve & enjoy!
Nutrition
Have questions? Comment below and we’ll answer promptly.
Share what you made! Post a pic to Instagram and tag us @gigglingfork or with #gigglingfork. We’d love to see it!